Thursday, July 30, 2009

Poinsettia Template

We've been getting a lot of positive feedback from our friends at CHA. One project that everyone's been wanting a template for is our poinsettia box topper. Josh found an amazing website that gives you a crazy array of paper projects. It was found on the Canon website. If you'd like to see the poinsettia template click here. We just added some of our rhinestone brads to beautify the center of the flower.


We also wanted to show off a few of Canon's other amazing paper projects. Have you ever wanted your very own Saint Peter's Basilica?
Just click and print.
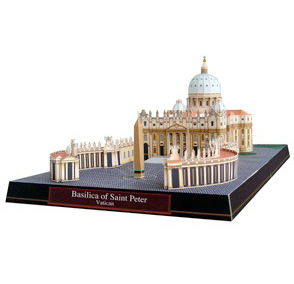
Or a little mouse...
There's some amazing projects if you have the time and patience. They put a whole new spin on the art of origami. Hope you enjoy this link as much as we do!

Tuesday, July 28, 2009

Who loves a deal? We do!

Afternoon everyone! Thanks so much for all the CHA feedback-and keep it coming! We love hearing from you.

We search the internet, a lot. Can't help it! There are too many interesting things out there. The other day we came across something we thought every one of you should know about! Maybe you guys are ahead of us, but it's peachycheap.com. If you've heard of steep and cheap, it's the same idea, only for scrapbooking! Each day they feature a product at HUGE discount! How cool is that? No SEI sightings yet, but our fingers are crossed for you! So go check it out and grab a bargain. And don't forget about our website, with savings across the board.


Monday, July 27, 2009

CHA- cha cha cha!

We're kicking off CHA this week. It's being held in Orlando, Florida this year! Lucky ducks... So while half the building is gone, enjoying beautiful Florida, we will be your informants and keep you posted on what's going on. CHA doesn't actually begin until tomorrow but SEI is having their preview party tonight, which I always hear is a highlight. There will be new projects and layouts on display that we've been slaving away on the past couple of weeks. We didn't get to photograph all the projects or layouts but we'll show you a few. Hope you like them... they're pretty amazing (I can only say that because Josh made the most amazing Christmas Mint project)

Winter Song
Moravia


Christmas Mint
Amazing, huh?

If you're lucky enough to be at CHA, let us know how you're liking it. If you're enjoying CHA from home this year, let us know what you think about these projects!

Friday, July 24, 2009

Thank you Pioneers!


Here in Utah, we have a special holiday today, Pioneer Day. It's something I never knew existed but without question pioneers definitely deserve to have their own special day. Just look at the picture above, none of that looks like fun: long dresses, tumbleweeds, dry skin, hot weather and kissing that beard? Well thanks to the many sacrifices of these trailblazers we have scrapbooking. How, you might ask? Well through many difficulties these pioneers settled much of the west, including the great state of Utah.

I'm not sure if you know, but Utah is the unofficial scrapbooking capital of America. Although first signs of scrapbooking have been around since the time of Aristotle, it took the World Conference of Records to make it what it is today. In 1980, Marielen Christensen shared 50 volumes of her family history at this conference that was held in Utah, and modern scrapbooking was born. Afterwards, the Christensens opened the first retail scrapbooking store here in Utah and called it Keeping Memories Alive. So in this long round about way, we have much to thank the pioneers for. If they wouldn't have settled Utah, the World Conference of Records may have never taken place and we would still have shoe boxes filled with photos. Ok, even if it the chances of that happening are slim, scrapbooking can still be one of the reasons we say, Thank You Pioneers!

Wednesday, July 22, 2009

New Paper Pads


We are excited to tell you about two brand new paper pads we are releasing at Michael’s. They will be available mid-August 2009. You will only be able to get these designs in a paper pad and they can only purchased at a Michael’s store.

The first paper pad is called Zoo Pals. There are so many adorable animals on these papers. They would be great to scrapbook kids, toddlers, babies, a trip to the zoo or Yellowstone. Besides your usual zoo animals (elephants, alligators, giraffes, monkeys, lions…) some of my favorite animals in this paper pad are the buffalo, penguins, sheep, owls and panda bears.

Not only can you scrapbook with these papers, you can teach with them too. In the past I have colored, cut and glued plenty of time-consuming projects together to teach my 2-year old but this paper pad makes it easy to whip together tons of fun teaching tools.

The project above was done using the Zoo Pals paper pad, Bridgeport ribbon, a 4"x6" black preservation album, and Poppy monograms. I cut out some of my favorite animal papers down to 4 x 6 added a little square of the solid paper and a monogram. For the cover I cut a piece of paper that had all the animals together and added a ribbon. This picture book is good to teach animals and letter recognition. It could be embellished more but the nice part is it took me less than an hour to put it all together.

One of the papers included in the Zoo Pals paper pad looks like a zoo map and includes all the animals and signs. It would be fun to make into a game board. Another paper in this paper pad is perfect for counting. It has different numbers of animals in numerical order with the numbers by them. This could be used to teach animal names, counting, or number recognition.

Do you have any other ideas of how to use these papers? Do you love it? Check back later for a project using our other new paper pad, NutMeg.

Maria

Friday, July 17, 2009

Guest Blogger Giveaway- Little Lovebirds

Amy requested our Lovebirds line to work with. The layouts turned out beautifully! The feel so summery and fresh. Amy had this to say:


"I had a lot of fun with the Lovebirds line. It’s not hard to be creative when you have such great products to work with! Thanks for letting me be a guest blogger, I enjoyed every minute of it. Cheers!"

By now, you are familiar with our giveaways. Leave a comment telling us which of Amy's posts was your favorite by Monday, July 20th at midnight. The winner will be announced 07.21.09. The giveaway includes the following:

Lovebirds Assortment Pack - includes:
• 18 treated patterned papers
(foil, glitter & shimmer)
• 2 lace papers
• 1 sheet of Lovebirds die-cuts
Lovebirds cardstock stickers
Lovebirds epoxy stickers
Lovebirds rub-on designs
Lovebirds ribbon

Good luck and have a fabulous weekend!

Thursday, July 16, 2009

Smokey Eyes Done Right

I love this tutorial! If you can get this technique down, you'll look fabulous in your photos. The better the photo, the better the layout, right?

Growing up I loved makeup and would paint anyone’s face that would let me (and when I say paint, I mean that literally…sometimes the outcome was a bit scary. I’d like to think I’ve gotten a bit better over the years). About 5 years ago I had a little stint as a makeup artist. I worked in Southern California for a summer selling and doing makeup for all sorts of people. During this time I learned how to create the perfect smoky eye, great for summer nights!


Instructions: (the steps correspond with the above photo)
1. Start by curling your eyelashes (I recommend Covergirl’s lash curler).
2. Then brush your entire lids with a soft neutral shadow (I like Stila’s eye shadow shade: kitten).
3. Now, with a deep silver or gray eyeliner (I use Estee Lauder Artist Eye Liner color: slate with a great smudger on the end) thickly line the upper lash line.
4. Next it is key to smudge the liner to create a softer look rather than a harsh line. With a grey/brown loose eye shadow, softly brush the powder across your eyelids to the crease and lightly brush over your liner and under your bottom lashes (I like L’Oreal’s On-the-Loose shimmering powder, color: orb).
5. Now with a golden brown liner, trace your bottom lash line, I like to do a straight, slightly thick line to give a more dramatic feel (try Rimmel’s Special Eyes pencil in ginger tea).
6. Lastly, use a dramatic black mascara on your lashes - two coats will really give depth to the eye (I strongly recommend Clinique High Impact Mascara in black – it is a very wet and dramatic mascara).

That’s it! Now you are ready to transform into a summer goddess…enjoy.

Wednesday, July 15, 2009

Guest Blogger- Give to get a response!


When I know a friend or family member’s birthday is approaching I like to come up with a more personal gift than something you just buy in the store. This drives my husband crazy, but I just love creating a gift that will really become a keepsake. Being that I’m in the line of work that I am, I like to create smaller photo albums and give them as gifts. These are usually around 8”x8” and include photos from special events or sometimes even just a bunch of random photos.

In this graduation album I liked the idea of using her school colors, green and white, and then adding black to give it a youthful feel. The black and white photos just seemed to fit perfectly with the overall theme. These are always a big hit and really show that you care.

So, next time you have a gift to give, consider making an album similar to this one. I promise you’ll score some extra points with whoever the lucky recipient is.

Tuesday, July 14, 2009

Guest Blogger- Photos feeling blue? Add some color!

I have a little motto I stick to when I create pages – the pictures are the focus! I know most of us aren’t professional photographers and our pictures don’t always look perfect, but I believe cropping and some small effects will help your ordinary photos look top notch!

1. Cropping can do wonders to an average photo. First you need to decide what you want in the photo. Most the time you are going to zoom way in – there always seems to be a lot of empty space. Do you want a horizontal or vertical photo? Get creative.

2.
Brightness/Contrast Most photos need some brightening and I like to use extra contrast. Do this by going to Image > Adjustments > Brightness/Contrast and then adjust to your liking.

3. Effects Lets look at some basic effects to ensure that your photo tells a story. Here are three different simple effects and the directions for using Photoshop (there are much more complicated ways of adjusting color in Photoshop, but I wanted to just stick with a couple easy ones).
• SEPIA FILTER – this does not necessarily change the color of your photo to shades of brown and tan, it just gives your photo an older, dreamy sort of feel. Go to Image > Adjustments > Photo Filter choose sepia filter and play with the density (I used 49% density on this photo).
• ENHANCE COLOR – this brightens all the colors in the photo and gives a more intense feel. Go to Image > Adjustments > Selective Color, here you should choose the colors in your photo from the drop down list and adjust each line to get a bold effect.
• BLACK & WHITE – I love black and white photos - they have such a timeless look and feel. The key to making B&W photos look amazing is to play with the color contrast. In this case you will change your photo to B&W before you change the brightness and contrast. Go to Image > Adjustments > Black & White, then use your brightness/contrast tool generously.

Good luck and have fun with it!

Monday, July 13, 2009

Guest Blogger- Inspiration Anyone?

I love the show Project Runway. Every season they do an inspiration challenge where the contestants must take pictures of places (i.e. famous buildings, museums, parks, gardens, etc.) & then create an outfit designed in the spirit of whatever it was that inspired them. It is so fun to see what they get inspired by and how they translate that into their designs. One designer that stood out to me chose the Chrysler Building as his inspiration and designed a unique art deco dress to showcase. As you see from the pictures…he did a pretty good job.

As creative people, I think we can all agree on one thing – inspiration is the key to reaching our full creative potential. A lot of times we find ourselves feeling a little less than creative at all, let alone inspired. What are we to do!? Well, I’m a real believer in the thought that inspiration can come anytime anywhere, but that also doesn’t mean that it comes every time and everywhere. My husband has some notebooks that he orders online and their tagline is “I’m not writing this down to remember it later, I’m writing it down to remember it now!” I think this really can apply to the creative process. We all need a great place to display the things we find that serve as our inspiration…hence, the ribbon board.


I saw this ribbon board on Martha Stewart and thought it was perfect to hang in your creative space and load with anything that “moves” you.

MATERIALS
Homoste board (a tackable surface available at home-supply stores and lumber yards)
Tight-weave linen (available at art-supply stores and fabric stores)
Ribbon
Upholstery tacks
Picture hanger

click to enlarge
DIRECTIONS
• Cut the board, or have it cut at a lumberyard, to the desired size.
• Pull the linen taut over the front and around the sides, and staple the four edges to the back.
• Fold the corners neatly, and staple flush to the board (A). Let your creativity loose in weaving a pattern with ribbons (B & C).
• Use upholstery tacks (look for ones with intriguing designs) to secure the ribbons (D).
• Screw a picture hanger to the back of the board, and hang on the wall.
• Tuck your snapshots, cards or anything you wish behind the ribbons; you’ll need few, if any pushpins.

Amy Balmforth- Me in a Nutshell


I grew up in St. George, Utah surrounded by the gorgeous red cliffs and sweltering desert heat. I’d have to say that I learned to love the arts from my amazing mother. She always encouraged our creativity and made sure we had every opportunity to explore our interests. From piano and sewing classes to simple trips to the craft store where we’d get to pick out any project we wanted, my siblings and I spent countless hours at home practicing, painting, designing…you name it, we did it.

I heard once that every teenage girl goes through a photography stage and while I didn’t necessarily mean to make a career out of it, it kind of fell upon me. I should add here that I’m not a photographer by any means, but I surely have developed a deep admiration for photos – both old and new. So how did I end up creating custom photo albums for a living? Well, about 3 or 4 years ago I had an epiphany of sorts (or at least I like to call it that). I realized that so many people have all of their priceless photos hidden away under a bed or stored in a filing cabinet (yes, even here in Utah - the scrapbooking capital of the world). This is just a shame. So many wonderful memories and beautiful photos and no one gets to see them.

I really believe that most people, given the time to do it themselves or the know-where to have it done for them, would absolutely love to have their pictures organized and put in an album. Memoir has really been a great experience for me and I just love seeing my clients’ faces when they rediscover their treasured photos.

I currently live in Salt Lake City with my wonderful husband Casey and mostly work from home except for the occasional client meeting. I love to play tennis, hike, be outdoors….and shop. I hope you enjoy what I’ve put together this week – I feel like it represents a little of who I am. Cheers.

Friday, July 10, 2009

Guest Blogger- Amy Balmforth

I've had the pleasure of knowing Amy for over three years. She is one of the most down to earth people you'll ever meet. When I was trying to find some guest bloggers, I couldn't believe that I hadn't thought of her sooner. Amy has a job that we all would be jealous of... she scrapbooks for a living! This next week she'll be giving a peek into what she does. If you want to see more, visit her website Memoir or her blog. Here's a little bit about Amy:


Random Tibits about Amy Balmforth
:
• I’m a warm weather girl yet I live in the best ski/snowboard city in the country (at least according to my husband).
• I like my hot dogs with mustard and pickles.
• I started my company, Memoir, two years ago. We make custom photo albums and other novelties for all sorts of people and events. It’s been both a joy and a challenge at the same time – I’m really looking forward to the future of Memoir.
• No one can pronounce my last name; hence, I answer to Balmfy, Balmford, Balmsworthy, Blamforth, and so on.
• I don’t have a MySpace, Facebook or Twitter account and I’m proud of it!
• I enjoy a good book, my all time favorite is Pride & Prejudice by Jane Austen
• AND…I have the greatest husband in the world – I’m so lucky!
Well, we've made it to the end of the week! Don't worry, Dot will be back again next week with her clever tips, giveaways, and little inspirations. You all have been very gracious while I've shared some fun, non-traditional stamping ideas this week. So far, we've used stamps to make a personalized notebook, embossed scratch-and-sniff cards, and a metal tin portable paintbox.


The last technique I wanted to share with you is a little more general, but hopefully it will leave you inspired to make all kinds of stamped gifts and keepsakes. Let's look at stamping on fabric, and other textured surfaces. First, check this out:


You might remember this little bag from Maria's December 8th post from last year. It's a little muslin gift bag I made with various Alpine Frost embellishments - including a velvet iron-on, rub-on, and Alpine Frost stamps.

Many of our readers may not be aware, but we sell several fabric scrapbooking elements in our online store. To say that these specialty papers add texture and dimension to your layouts and cards would be a huge understatement. So how can you make them even better? I'm glad you asked. You stamp on them, of course!


Stamping on fabric does two things. First, it allows you to make custom repeating patterns that our eyes naturally expect to see on fabric. And second, it gives that wonderful texture to your project that makes it feel down to earth, well-worn, and authentic. In addition to stamping on fabric, a whole number of materials kick stamps up a notch, including velvet, textured and embossed cardstock, textured wallpaper, and many acrylic gels and mediums on regular old paper. Here is a sampler, giving you one more sneak peak at our upcoming Moravia collection stamps:


Now it's your turn. The next time you come across a textured paper you love, or any other interesting surface that just appeals to you, break out your stamps and experiment! Stamps give you the freedom to personalize and custom create in limitless ways.

Thanks again for tuning in this week. We love all our readers - you make this blog worthwhile and lots of fun!

--Josh

Thursday, July 9, 2009

Stamping Techniques Continued...

We've been talking this week about how easy stamps are to use, and how many projects they're perfect for. Today's stamp project is a lot like Monday's notebook - we're taking an existing item and using stamps to personalize it.

Which item, you ask? Containers. Specifically, I'm focusing on using stamps on the little metal tins that you can find anywhere and everywhere these days (Altoids mints, AOL cd mailers, etc.) I wouldn't say I collect them, but I do hang on to them when I find them in good condition. They're ideal for so many crafts, for giving small gifts, and for treasuring little nick-knacks and keepsakes. Here's just one way to dress them up with stamps...

Idea #3: Stamped Traveller's Paintbox

If you're going to re-use a tin for something involving water or anything moist, make sure it's actually made out of aluminum. Most tins are made out of - yep, you guessed it - tin! The edges are usually curled down around an iron wire too, and both tin and iron rust very easily. But it's not too hard to find a tin made from aluminum (search etsy.com for "aluminum tin"), and the aluminum ones won't rust.

The aluminum tin I used for this project came with a deck of cards in it, and I love the finish just like it is - all shiny and satin-smooth. So I stamped on the bare metal with the scroll from the Windsor stamp collection in Ocean Deep ink. To make it permanent and durable, I set it with embossing powder and a heat tool. I bought a $1 watercolor set from the local dollar store, removed the lining, and cut it down to fit inside the tin. I bought the brushes on clearance at Walmart for about $2.00, cut them to fit in the tin, and sanded the ends smooth. Last but not least, I cut several little cards of watercolor paper, rounded the edges, and clipped them together on top of the paints and brushes. Voila!


That's it! And this is just one out of hundred of possible uses for these little tins, from portable sewing kits to gift card carriers, and travel games to mini jewelry boxes. As a matter of fact, leave a comment while you're here - what are your ideas for metal tin projects?

Thanks!

--Josh

Wednesday, July 8, 2009

Scratch and Sniff with Stamps

Dot is out of the office this week, and according to my instructions, I was supposed to have posted this much earlier in the day. My apologies - we got a new webcam for filming online tutorials, and I spent the day trying to set it up for this post. I am still getting used to it, but I think it's an improvement over the one I used for previous tutorials.

On to stamps! Remember, this week we're learning how versatile and easy stamps can be for making small gifts and projects. There's no particular order to these techniques - I've just picked them up here and there in craft and scrapbooking publications. I hope at least a few of them are inspirational to whatever you're working on right now!

Idea #2: Scratch and Sniff Card

This little stamp idea has been around for a while, and you can find video tutorials for it elsewhere on the web. But I wanted to film our own, for those of you who haven't seen it before. I'll skip the explanation and just let you watch it:


In the video I mentioned other scented powders you can add to your embossing enamel, but then I forgot to tell you which ones. You can use just about any finely ground, aromatic powder, as long as it doesn't contain sugar or anything else that burns at a low temperature (your average heat embossing tool runs anywhere from 450 to 650 degrees). Try using extra-fine cocoa powder with brown embossing powder for luscious chocolate decorations (think Christmas Mint!). Add cinnamon, nutmeg, cardamom, allspice, or bayberry to orange or red embossing powder for warm and spicy autumn scented projects. And of course, there's no end to the various flavors and combinations of powdered drink mixes (like kool-aid).

Lastly, if making your own scratch and sniff embossing powder is more work than it's worth to you, check out gel-a-tins Scented Embossing Powders. They've cooked up some truly yummy flavors for just about every gift-giving occasion.

That's it for today! I will try to put a photo of the finished card from today's tutorial in tomorrow's post. And I will definitely get it posted earlier in the day!

--Josh

Tuesday, July 7, 2009

100th Post Giveaway Winner!

Thanks to everyone for entering our giveaway. We appreciate your patience with our instruction updates and all. Stay tuned today for another stamp tutorial from Josh (Wasn't it great yesterday?). Now for what you've been waiting for... and the winner is:

Congratulations Joni, please email us your contact information. E-mail seiblog(at)shopsei(dot)com, and we'll send out that yummy sample pack. Thanks again for all those who participated!

Monday, July 6, 2009

About Stamps

Stamps scare people.

I know, you're probably thinking, "Whatever, stamps don't scare me. Stamps are little and charming and easy to use." Then why don't scrappers use them more often? I'm sure that some of our readers are avid stamp collectors and use them as much as any other embellishment. But for the majority of you - when was the last time you used stamps on a layout or card? If you're like me, it was quite a while ago (even here at SEI, where we design the stamps).

So what is it about stamps that make us afraid to use them? Even if we're not afraid of them, why do we seem to push them way back in the scrap tote and reach for the rub-ons or die-cuts over and over again instead? Maybe because stamps can be used in so many different ways, they push us a little bit too far out of our creative comfort zone. Well, in the next few posts we're going to conquer our fear of stamps and use that creative freedom to make some very meaningful, personalized gifts and keepsakes.

Idea #1: Personalized Notebook

Do you know an aspiring artist or writer that goes through notebooks and little pads of paper like they're going out of style? Or maybe you know a mom, or maybe you are a mom, looking to get a little more organized with receipts and coupons and everyday to-do lists. A notebook is a clever idea for a quick and easy gift, and there's no reason it has to be the boring office-store variety with a screaming yellow cover that says "Mead" on it. And nothing makes personalizing a notebook quicker and easier than a good set of stamps.

To start with, I bought a perfect little blank notebook with clear covers at Borders for just over $5 (regularly $6.99, with a 30% coupon). This is how it looked right out of the wrapper:


My sister is a busy mom with three kids, and she also clips a lot of coupons, and saves all of her shopping receipts. I spent the 4th of July with her and her family, and I thought a pretty little notebook would be a nice way of saying thank you. To make it personal, I stamped the leafy scroll from the Bridgeport stamp collection in Moss Green ink on the front page and applied one of the Bridgeport rub-ons. Then I stamped the butterflies from the same Bridgeport collection in Ocean Deep ink on the inside of the front cover, to get a nice layered effect*. Lastly, I stamped the same scroll and butterflies on each of the dividers inside, and on random page corners throughout the notebook. This is how it looked when I finished:


That's it! I have a beautiful, personal gift for my sister that cost $5.00 and took about 15 minutes! And there's no limit to the blank items you can stamp for your own personalized gifts.

Do you have any great stamping ideas? Leave us a comment, or send us an email, and share your favorite stamp projects!

-Josh

*When stamping on various kinds of plastic, test your inks in an inconspicuous area to make sure they will dry without smudging.